Now on UPilot, you can customize your contact tables and custom views to include the custom fields you’ve created. With the complete customization, not only you can add or remove columns from your tables to include or exclude data, but you can also reorder your columns in the order that works best for you.
This also provides you with the ability to create different custom views with different columns arranged as needed. Your preferences of both columns selected and their arrangement are saved while saving a new view.
Adding Columns to Your Table
To add a custom field to your table:
- From your contact table, select the “Column Customization” button located on the top-right of your table, just next to ‘+Filters’
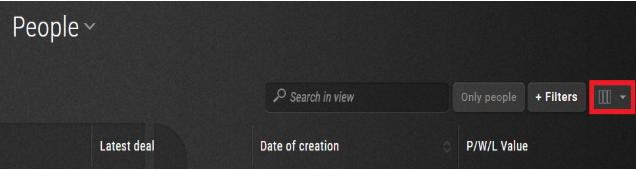
- From the drop-down, select the custom fields you wish to add to the table

- Click anywhere outside the drop-down to save your selection
- Your table will now reload along with the newly added custom fields displayed as well.
Organizing Your Columns
Once your new columns have been added, you can further fine-tune your contact table by arranging the columns as you please.
To re-order the columns, you can:
- Navigate to your desired Contact Table View
- To now reorganize the columns, simply click and drag your columns to the left or right as desired.
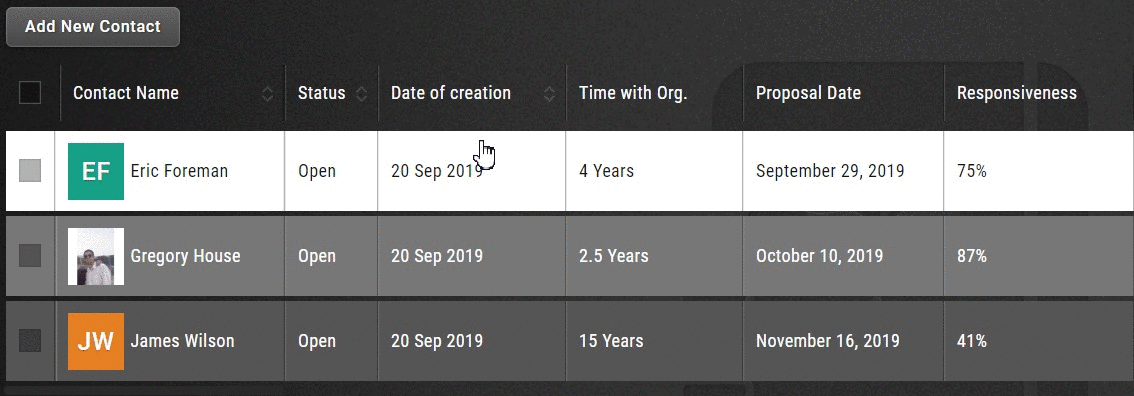
- Now, the columns on this view will remain in this alignment.
While saving a view, your column visibility and arrangement preferences are saved as well; you can thus have different views with different arrangements!
Removing a Column
Of course, UPilot lets you remove even default columns from the view in your Contacts Table. By adding in new columns and removing unneeded columns, you now have even greater control over data clarity.
To remove a column:
- From your Contact table, select the “Column Customization” button located on the top-right of your table, just next to ‘+Filters’.
- Deselect fields that you no longer want to see in your contact table.
- Click anywhere outside the drop-down to save your selection
- Your table will now reload only with the required fields displayed.