UPilot allows you to do a complete background sync with Gmail, Exchange, as well as through IMAP/SMTP and automatically linking your emails with the required contacts.
While you can write and send single emails to any contact in your account directly from UPilot, you can also create specific templates to quickly send out your emails.
The email templates can be extremely helpful in creating a process for your team or simply to reduce the amount of time spent sending your regular emails.
Creating a Template Category
You may have several different templates which can be adequately housed under specific categories. For example, you may have several categories such as ‘Onboarding’, ‘Proposal’, ‘Contract’, etc. Each of these categories can have several templates under them.
To create a new category, you can: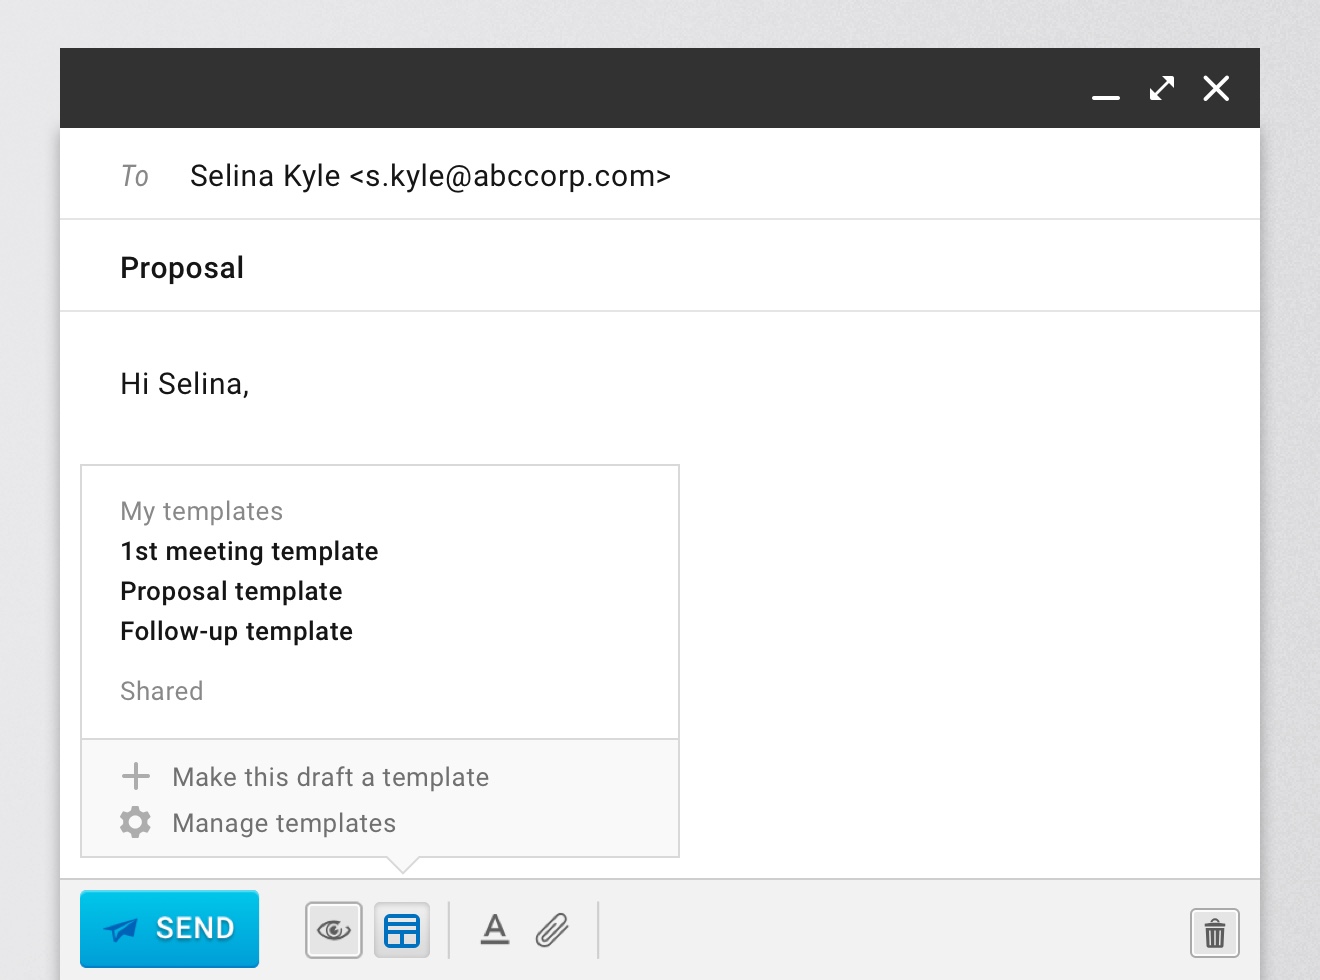
- Open any contact/deal
- Click on Compose email to open the email composer
- Click on insert template located at the bottom of the email composer next to the Send button
- Click on Manage Templates from the options that appear
- Click on + Add Category at the bottom of the template manager panel
- Enter the category name as needed
- Click Save
- Your template category has now been created and can be used to add further templates inside
Adding a New Template
To create a new template for your emails, you can: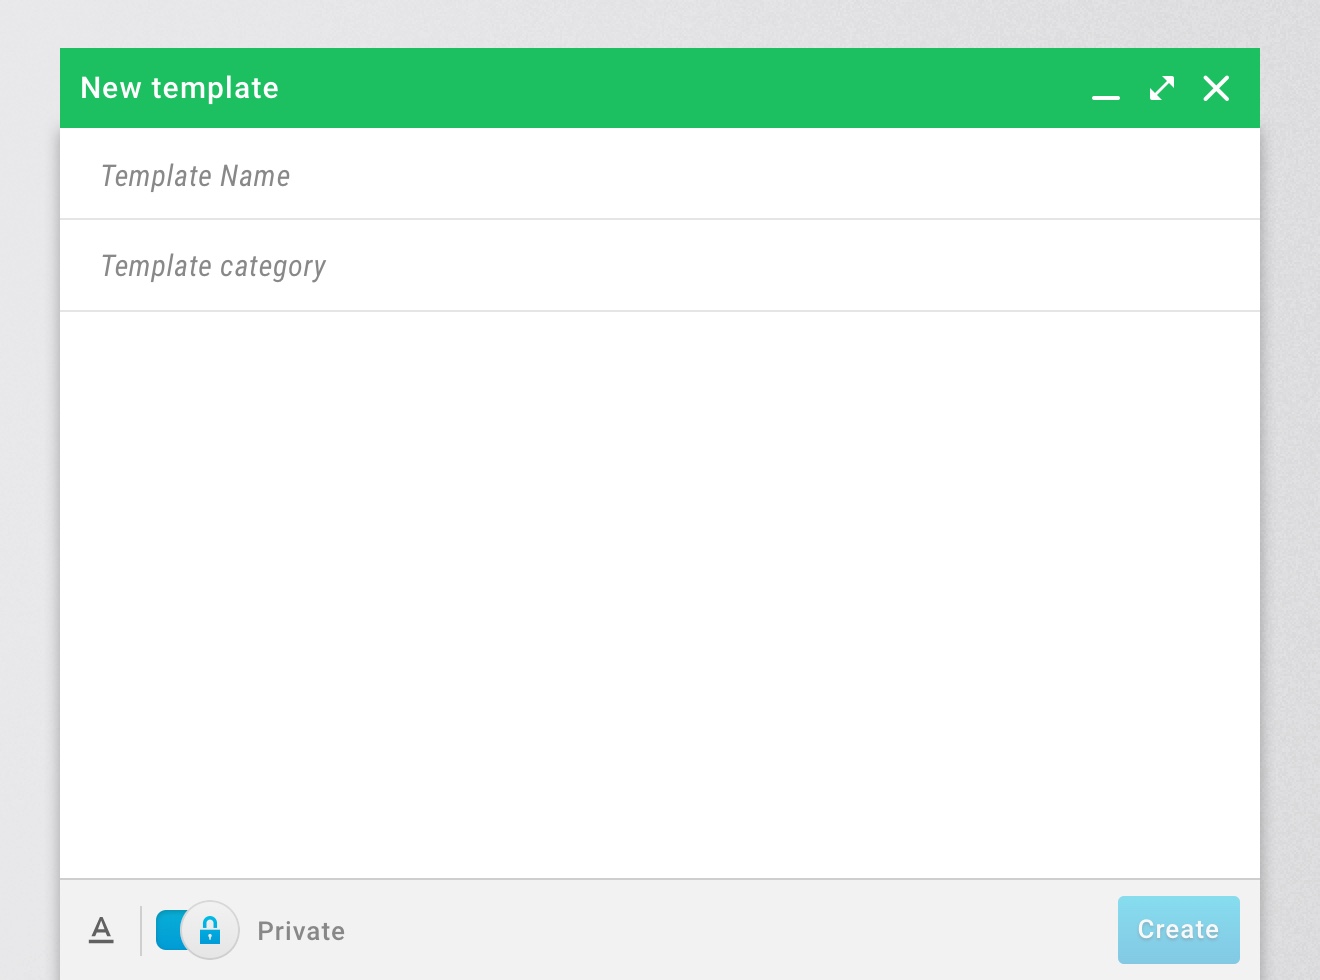
- Open any contact/deal
- Click on Compose email to open the email composer
- Type in the email as you would like to save as a template
- It is highly recommended to remove the salutation as well your signature before saving a template as these are added automatically for each new email composed
- Click on insert template located at the bottom of the email composer next to the Send button
- Click on Make this draft a template
- Enter the details such as Template Name, Template Category, and the Subject as needed
- Select if the template is to be private (only visible for you) or Shared (visible for the entire team) from the toggle at the bottom of the template creator
- Click Create to save the template
- Your template has now been created and can be used to send emails.