With the UPilot CRM – Mailchimp integration, in addition to sending over contact from UPilot to Mailchimp, you can also completely manage Mailchimp tags in UPilot as well.
Tags in Mailchimp are specific to individual lists and can help you create segments for targeted campaigns.
The Mailchimp tags can be managed in 3 specific ways in UPilot:
- Adding a new tag to a list
- Adding a tag to a contact
- Removing a tag from a contact
Adding a new tag to a list
For any list that you have in Mailchimp, you can create new tags for the list directly from UPilot’s individual contacts.
To add in a new tag to a list, you can:
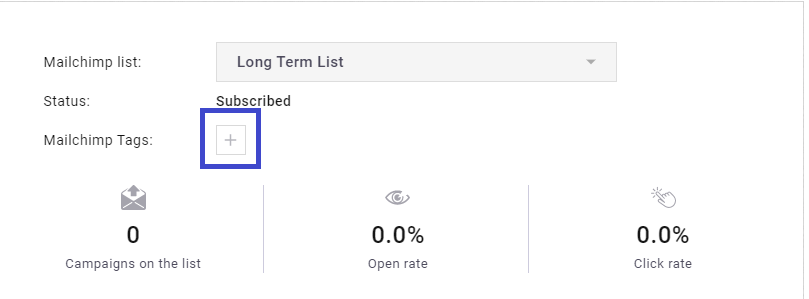
- Open any contact which is in the list
- Click on the Mailchimp tab on the top right corner
- Select on the ‘+’ next to the ‘Mailchimp Tags:’ option
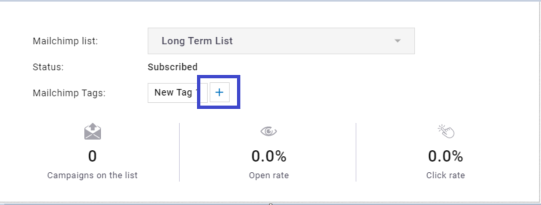
- Click on ‘New Tag‘ in the popup that appears
- Type in the tag name as needed
- Click in ‘Add tag‘
- Click ‘ Apply‘
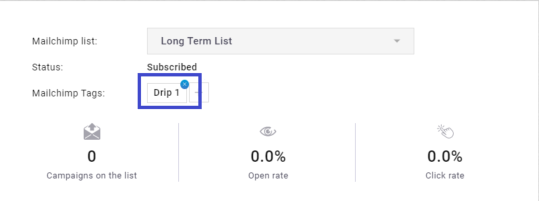
- Your new tag is now created in Mailchimp and will be applied to the contact
Adding a tag to a contact
To add in a tag to any existing contact, you can:
- Open any contact which is in the list
- Click on the Mailchimp tab on the top right corner
- Select on the ‘+’ next to the ‘Mailchimp Tags:’ option
- Select the tag you’d like to apply to the contact
- Click ‘Apply‘
- Your tag is now applied on to the contact in Mailchimp as well
Removing a tag from a contact
To remove a tag from any existing contact, you can:
- Open any contact which is in the list
- Click on the Mailchimp tab on the top right corner
- Hover over the tag to be removed from the contact
- Click on the ‘X’ that appears on the tag
- Your tag is now removed from the contact from Mailchimp as well
This article is a part of the ‘Advanced Customizations’ series. Articles in this series include: