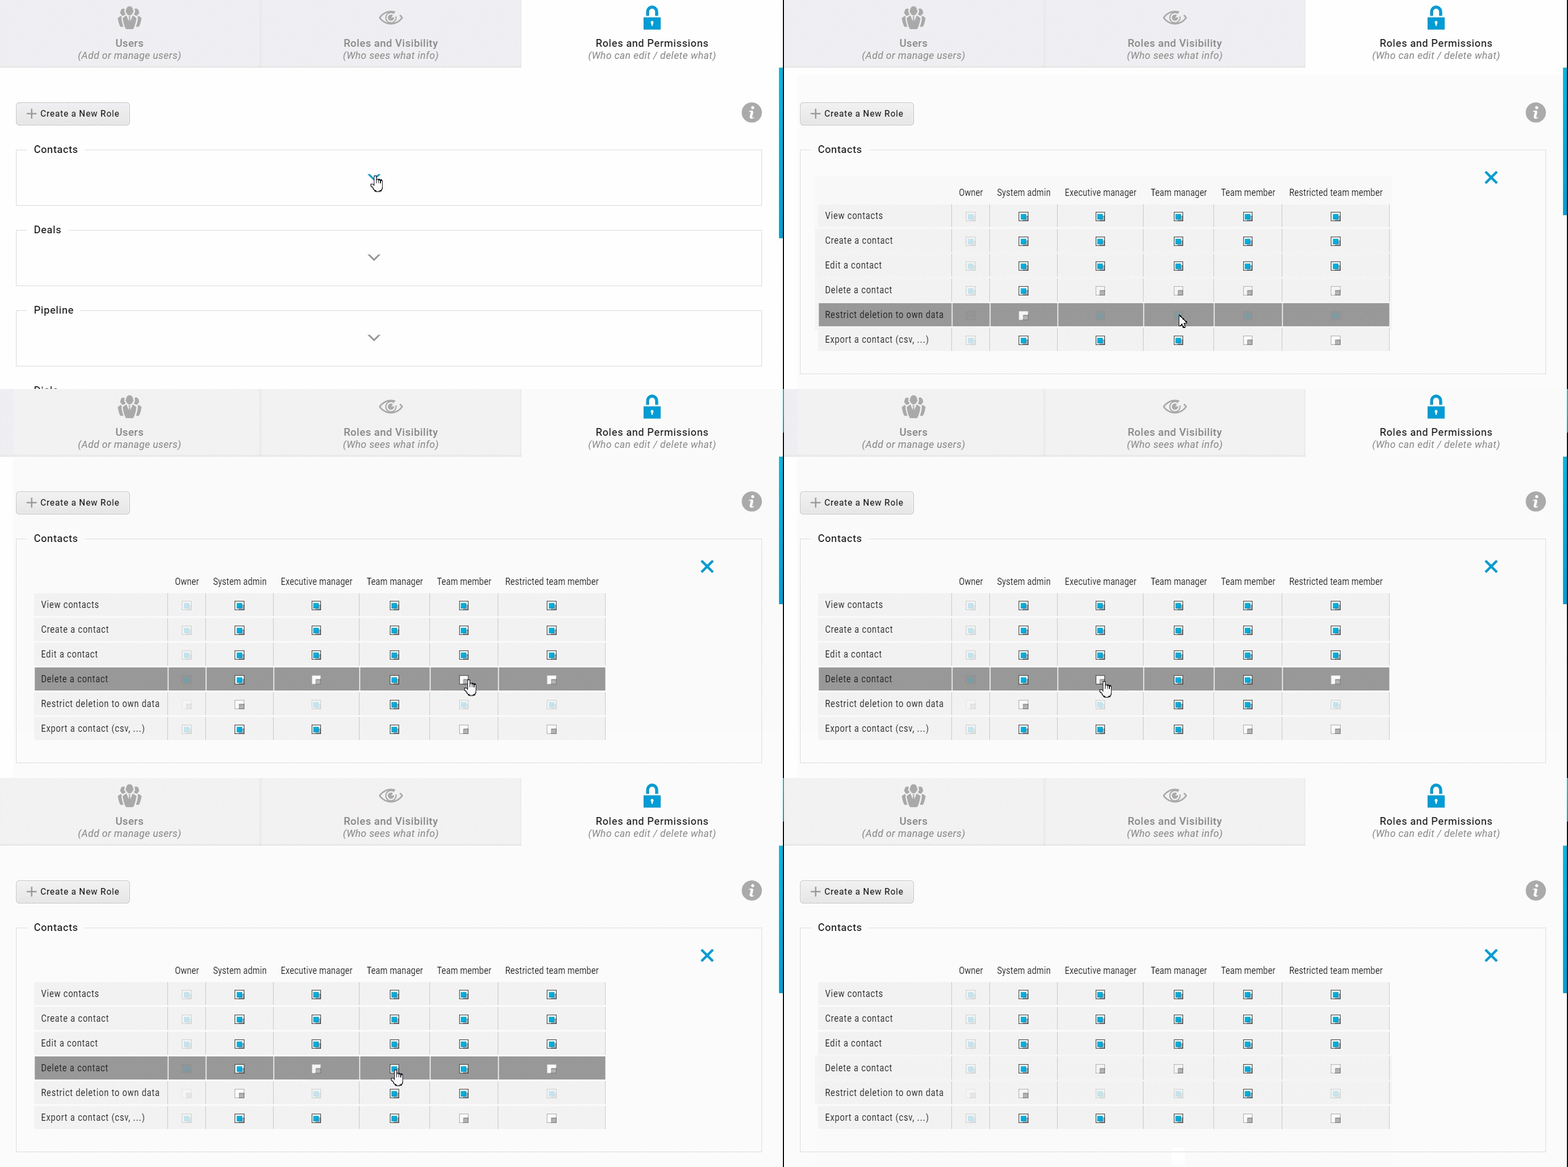
With UPilot CRM, you can easily emulate the various roles in your company or sales team, and set the permissions associated with them. You can easily drill down to each action (Creation, Deletion, Edition, etc.) within a feature such as Contacts, Deals, etc.
It is possible to change the permissions for:
- Contacts
- Deals
- Pipeline
- Dials
- Tasks
- Notes
- Filter Views
- Settings
- Tags
- Product and Categories
Setting the Permissions
You can assign the required permissions in the following manner:
- Click on Settings > Users and permissions > Roles and Permissions
- Click to open the section for which you would like to set the permissions for
- Click on the check-box to set the permission
For example, by clicking Contacts, and deselecting the check-box located under “Team member” for “delete a contact” would remove permissions for all users with the role “Team member” to delete any contact. - Repeat the same for any other section
- Click the ‘Save‘ icon located on the top right corner of the open window
- Your permissions have now been applied and updated for all roles and users

Pro Tip:
A use case in which the permissions come in extremely handy is if you have users doing data entry but who should not see any other data in your system. You can manage this by simply deselecting the check-boxes for all features except the “view a contact”, and “Create a contact”.
This article is a part of the ‘Users and Permissions’ series. Articles in this series include:

