With the UPilot Mailchimp integration, you can easily send bulk emails to your prospects, clients, or any other contacts in UPilot.
The integration allows you to:
a) Send your contacts from UPilot to Mailchimp in a couple of clicks
b) View the Mailchimp activity for any contact directly inside UPilot
In case you don’t have a Mailchimp account yet, you can register for one from:
https://login.mailchimp.com/signup/
Connecting UPilot to Mailchimp
To set up the integration between UPilot and Mailchimp, you can:
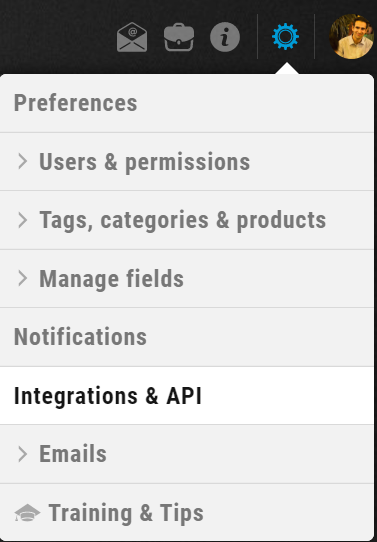
- From your UPilot account, click on Settings (gear icon on the top-right corner) > Integrations & API

- From the “Mailchimp integration” section, click on CONNECT

- From the Mailchimp page that appears, enter your Mailchimp username and password
- Click on Log In
- From the authorization page, click “Allow”
- Your Mailchimp account is now connected to UPilot.
Sending Your Contacts from UPilot to Mailchimp
Once your Mailchimp account is connected to UPilot, here is how can you easily send your contacts to your Mailchimp account:
- Go to the Contacts page in UPilot
- Set up the filters as needed so you are only viewing the contacts you’d like to send to Mailchimp
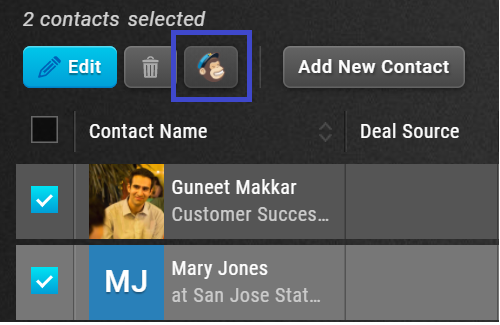
- From the checkboxes on the left of the person’s name, select the contacts you’d like to send to Mailchimp
- Click on the Mailchimp icon that appears

- Hover over an existing list in Mailchimp or create a new one > Add to list
- The Tag has now been removed from the Contact
Viewing Mailchimp Activity in UPilot
To view the Mailchimp activity for any contact inside UPilot, you can:
- Open the contact whose activity you’d like to view
- Click on the Mailchimp logo on the top right corner of the open contact
- You will be able to see the Mailchimp activity of the contact, including Capiangs sent, Open rates, click rates, and the timeline
This article is a part of the ‘Integrations’ series. Articles in this series include:

